Breads

Falling over Bagels

_DSC0818

All I can ask is “Why?” Sometimes life sends you curve balls. Is that the saying that people say? Well, life has sent me quiet of bit of those balls and sometimes I just want to throw them in the fire. For the past month and a half, almost, I have been suffering with colitis. If you don’t know what that is, please do yourself a favor and don’t look it up, it’s terrible. You literally feel like your dying from the pain and all I can say is take care of your gut and don’t take too many antibiotics IF you can help it.

So, Christmas and the holidays were non-existent for me, because I couldn’t celebrate while kneeling over with pain. Even though the pain kept me down, there have been  days where I have felt fine. On one of those days I decided to embark on making bagels.

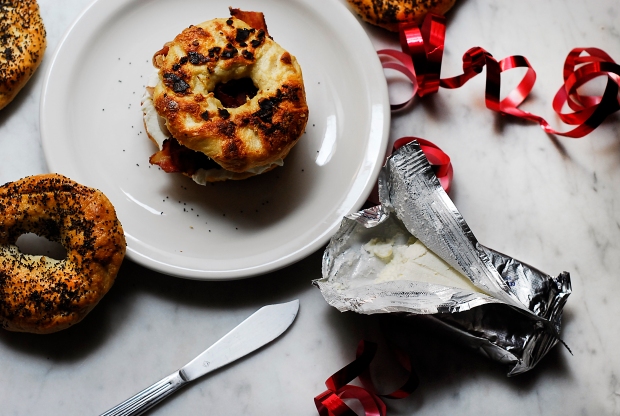
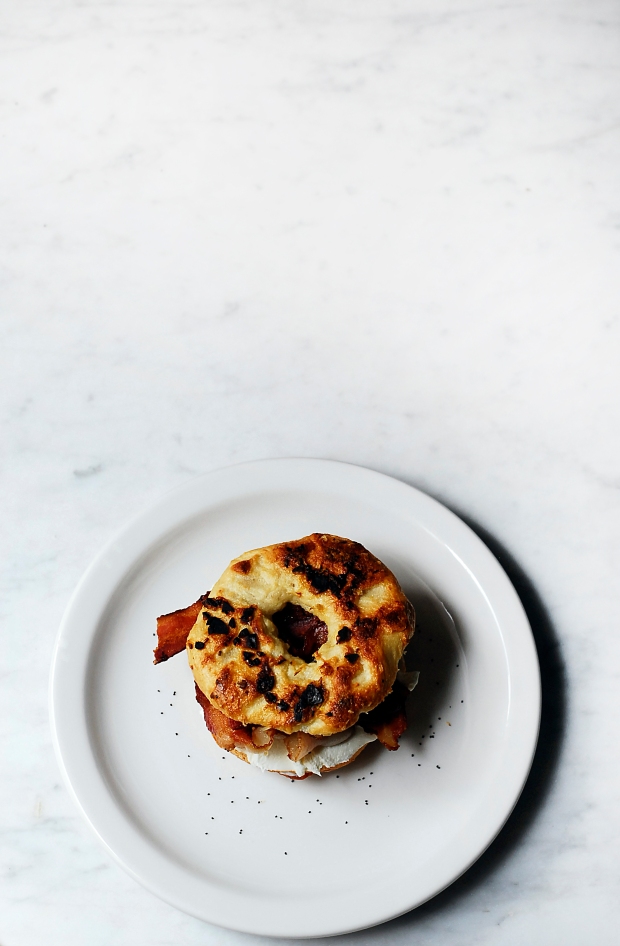
Now, I have never in my life made bagels and I honestly thought it would be an easy task, but as you can see some of my bagels have a unique shape. Which is fine and Julia Child would probably approve of the attempt. Yet, in future baking, I am determined to create the perfect, circular shape for a bagel.

_DSC0831


Poppy Seed and Parmesan Garlic Bagels

Makes 12

Ingredients 

Poppy Seed Bagels

1 tsp. of active yeast

2/3 cup of warm water

1/2 tsp. of brown sugar

2 cups of bread flour

1 tsp. of kosher salt 

1/2 cup of water

1 tsp. of baking soda 

2 beaten eggs for egg wash

1/2- 1 cup of poppy-seeds (make ahead)

Parmesan and Garlic Bagels

1 tsp. of active yeast

2/3 cup of warm water

1/2 tsp. of granulated sugar

2 cups of bread flour

1 tsp. of kosher salt

1/2 cup of water 

1 cup of shaved parmesan (make ahead)

1/2 cup of minced garlic (make ahead)


Extra: flour, oil, damp dish towels, a big pot

Directions:

  1. In two separate bowls add yeast, warm water and sugar. See Notes. Let both mixtures sit for 5 to 8 minutes. Then set aside.
  2. In two big bowls sift flour and salt together till combined. Then create a well into the flour and add the yeast mixture.
  3. Slowly mix the dough and incorporate the 1/2 cup of water for both mixtures. Then knead the dough for 5-10 minutes or until elastic.
  4. Then lightly oil two clean bowls. Let both of the dough mixtures rest for an hour with a damp cloth on top.
  5. After resting shape the dough into bagels. By doing this, cut the two dough mixtures into halves. Then with a sharp knife cut 6 medium size balls–making 12. (6 for the poppy-seed and 6 for the garlic bagels)
  6. Once you have your twelve balls, gently place your ring finger into the middle of the dough ball until your finger pokes through. Then carefully move the dough around in a circular motion with both of your hands pulling on each side as you go around. See shaping bagel video.
  7. After shaping all twelve bagels, on an oiled sheet or plate let the dough rest again with a damp towel for 30 minutes. Meanwhile, preheat the oven to 425 F.
  8. Once the bagels are done resting, create your hot water bath. In a big pot add water about half way with 1 tsp. of baking soda then bring to a simmer.
  9. Once the water has start to simmer, gently with a slotted spoon add the bagels one by one. Do this in batches of twos or threes, depending on the size of your bagels. Let each bagel boil for 2 minutes on each side. Then set aside to rest on a clean plate.
  10. Create your egg wash for the bagels and brush all of them till fully coated. At this point add your toppings, poppy seeds for one batch. Then, fresh minced garlic and shaved parmesan for the other. Cover the bagels completely.
  11. On a baking sheet bake the bagels for 30 minutes or until lightly brown. Bake the bagels in two separate batches.

Enjoy!


Notes: For the poppy-seed bagels mix the brown sugar into the yeast/water mixture.


_DSC0841

Photography by. Bernadette Mira

Christmas Time is Here (Julia Child’s croissants with cranberry jam filling)

I will always remember that Christmas.

That time of year is back again and I can already feel the anxiety setting in. There are times when I can’t help but think about the past. Especially about the time I opened up to my adoptive father about being sexually abused as a child.

Christmas time when I was a younger was all that I waited for with every passing year. I remember decorating the house till every room was filled with some sort of tinsel or sparkling lights. I cherished every second of it. You couldn’t stop me from dancing to the Grinch soundtrack with The Who’s singing “Trim up the tree with Christmas fluff…” That time of year was magical for me. Over the years it unfortunately lost its sense of innocence. That Christmas when I told my father about being abused left me raw and alone. I will always remember that Christmas.

The week before Christmas I had to say goodbye to my husband. We were both celebrating the holiday with our families, me in Virginia and him in Florida. He was my boyfriend at the time, but I still found it difficult to leave him. Maybe it was because I knew that I could confined in him about being abused. As soon as I made it back to VA with my adoptive parents I felt this sense of gloom over the house. Before entering the house that I grew up in, I looked up at it and all the memories of being abused flooded in. How I stayed in that house for years, I still don’t know how.

When Christmas Day came along I kept on contemplating if I was going to tell my father or not. My mother who already knew and saw me get abused said, “It’s up to you Bernadette.” I had to build up my courage throughout the day until by 8 pm or so I sat my father down and told him.

The moment went by so quickly. All I remember is him saying a joke afterwards about me being abused and him getting me a wet wash cloth to wash away my tears. That’s how it was with them. They think by washing away the problems that they will magically disappear. That method never works.

Now, that I am estranged from them, I can’t help but feel that Christmas has to be perfect. It’s not healthy to think that way and I’m slowly working on it. Even though this year has been tough in so many ways politically, socially and personally,  I have a loving husband. I have a silly dog and a new family in my husband’s family. I have met new people who I can consider real friends. I know that 2018 will be better. I know this because I will keep on trying to live for me and not for the family I grew up with.

Julia Child’s Croissants

Volume Two of Mastering the Art of French Cooking 

By Julia Child and Simone Beck 

Makes 12

Ingredients

1 1/4 tsp. of yeast

3 tbsp. of warm water (100 degrees)

1 tsp. of sugar

Second half of recipe

1 3/4 cups of all-purpose flour

2 tsp. of sugar

1 1/2 tsp. of salt

2/3 cup of warm milk

2 tbsp. of canola oil

1 3/4 sticks of chilled unsalted butter 

Cranberry Jam

Makes 3/4 cup

Ingredients

1 1/2 cups of fresh cranberries

1/2 cup of granulated sugar

1/4 tsp. of nutmeg

Pinch of pepper and salt

1/2 tsp. of cinnamon

1/3 cup of fresh orange juice

1/2 cup of water


Croissant Recipe: Equivalent version of croissant recipe. Here is a video of the master herself making some croissants on the show the French Chef.

Directions for Cranberry Jam:

  1. Throughly wash the cranberries, then pat dry with a paper towel.
  2. In a medium size sauce pan, add all the ingredients and stir on medium to high heat until it starts to simmer.
  3. Once it comes to a simmer, turn down the heat between low and medium. Stirring frequently for 15 minutes or until the jam comes to the wrinkle stage.
  4. Once the jam has come to the wrinkle stage, take off the heat and cool for five minutes.
  5. Pour the jam mixture through a fine mesh sieve with a glass bowl underneath to catch the jam. Do this with a spoon and patience. This should take about 10 minutes to get all the mixture through.
  6. Cool the jam in a glass jar and leave in fridge until ready to use. Keeps up to 2 weeks.

Enjoy!

Photography by. Bernadette Mira

Moroccan Eggs and Rolls

B30250D8-BA0C-47BE-88DE-E4FFBA30BCE7

Moroccan eggs, formally known as Shakshuka is probably one of my all time favorite dishes. It’s something so simple but utterly delicious. The combination of the spices with the sweet tomato sauce paired along with either sauté mushrooms or succulent chorizo is an experience that I always want to come back to. Well, possibly dive into depending on how hungry I am.

_DSC0447

 Even though this dish is simple, I wanted to pair it along with something maybe not so simple and adds a little bit more time in the kitchen. I promise you though, with a little more preparation ahead of time, it will be worth the wait. So let me introduce you to today’s dishes…

C748321F-C133-4157-9789-8E3917D7F17B

Moroccan Egg Dish with Moroccan Rolls

Ingredients

Egg dish

Serves 2-4 

2 to 3 eggs

1 14.5 oz can of puree/crushed tomatoes

half of 1 large yellow onion finely diced

3-4 large garlic cloves minced

2 tbsp. of olive oil

1/2 pound of chopped chorizo (or 1/2 pound of chopped white button mushrooms)

1 tbsp. of honey 

2 tbsp. of tomato paste

1 tsp. of paprika 

1 tsp. of crushed red pepper

1/2 tsp. of thyme

1/2 tsp. of turmeric 

salt and pepper to taste 

fresh oregano to top (optional)

Moroccan Rolls

Makes 6 

Ingredients

1 2/3 cup of white bread flour

1 tsp. of yeast

6.5 ounces of warm water

1 tsp. of sea salt

1/4 tsp. of granulated sugar

 4 tbsp. of toasted sesame seeds

Spice mixture

2 tsp. of cinnamon

1 tsp. of nutmeg

1 tsp. of turmeric 

1/2 tsp. of cardamom 

1/4 tsp. of black pepper

1/4 tsp. of cloves 

(Prepare spices together in a mortar and pestle to combine-keep in glass container till use)

Directions for Moroccan Rolls:

(May make the day before)

1. Gently rub the yeast into the bread flour. Once incorporated add the water, salt and sugar.

2. With either a standing mixer or by hand, mix the ingredients together till it starts to form together. Should take about 4 minutes. The dough will be sticky. Don’t  worry though, the dough will come together in time.

3. I like using the technique where you stretch the dough and fold it back together. For an example, watch here (stretch and fold technique)* While doing this technique, it helps bring the dough together by slapping it onto the work surface then folding over. Continue this technique for 10-15 minutes until the dough starts to come together.  After ten minutes or so, you can start adding some flour to the work surface. While working the dough add the bread spices till incorporated. To form a ball, fold each edge of the bread into the center and pinch together so it holds it shape.

4. Once the dough has been shaped into a ball, in a lightly oiled bowl add the dough ball and cover with a lint free towel to rest for an hour in a warm area.

5. After an hour turn the dough out onto a floured work surface and divide the dough into two. With the palm of your hands create two log shapes. To create the log shapes, use the heel of your palm to flatten the two logs and gently fold one side into the center then continue to do the same with the other side. Pinch both sides together going all the way down the log, so they hold the shape.

6. Turn the logs over with the pinched seem facing downwards, and cut 3 equal slices from each log, creating 6 rolls. To create the rolls into small balls, use the same technique of folding the edges inward into the center then pinch the edges together. Then with the palm of your hand gently smooth the edges out by rolling the ball in a circular motion going counter-clockwise.

7. After forming the 6 balls, brush one side with a little water then dip the rolls into the bowl of toasted sesame seeds. Continue this process with all of them.

8. After brushing the dough, add the rolls to a *baking sheet* or pizza stone. Cover the rolls again to rest for 45 minutes in a warm area until they double in size.

9. While the rolls are resting preheat the oven to 475 F.

10. Once the rolls are done resting, mist the inside of your preheated oven with water, either gently by hand or preferably a spray bottle. Afterwards add the tray of rolls to the oven and bake for 11 minutes or till golden.

11. After baking, rest the rolls on a wire rack for at least 5 minutes.

Notes:* If you don’t have a pizza stone, I like to use a baking sheet to create the same type of surface by turning the baking sheet upside down. So, if you don’t have a pizza stone do this before adding the rolls to the sheet for the second proof. See in direction #8.

Directions for Egg dish (Shakshuka):

1. In a medium cast iron skillet, add 2 tbsp. of olive oil, diced onions and garlic and sauté on medium heat for 5-10 minutes until lightly brown.

2. Then add salt and pepper to taste. Gradually add the chopped chorizo or mushrooms and mix with the onions and garlic till brown on medium heat. Then add the tomato paste and mix in well.

3. Once the chorizo has browned add the honey and seasonings and mix well until fully combined.

4. Then add the can of tomatoes and cover the top of the meat or mushrooms by using the back of a wooden spoon so only the tomato sauce is showing.

5. On medium heat cook for about 5-10 minutes, while keeping an eye on the meat, onions and garlic underneath to prevent burning.

6. After some of the tomato juice has boiled off, create 2-3 separate holes for the eggs to be placed. By doing this, gently with a spoon create a small opening for the egg to cook, you should see the bottom of the cast iron skillet so it’s able to cook. Do this with all the eggs, by cracking the egg on a flat surface and gently adding it into the skillet.(Without getting shells inside.) Cook for 5-8 minutes or till the egg whites have cooked but the yolk is still runny. Once again, be mindful of the onions, meat and garlic underneath so they don’t burn.

7. Serve dish in cast iron skillet for easy dipping. Top with fresh oregano and Moroccan rolls on the side.

Enjoy and happy eating!

8123F0A9-A923-465F-A6F6-C35AF3EDD09A

Photography by. Bernadette Mira

Curry Chickpea Pita Sandwich

pita girl

Photography by. Craig McDean(Left) and Bernadette Mira(Right)

Model: Gal Gadot

I never quite know how my weeks are ever going to be. When Sunday rolls around I try to set all these expectations. I’m going to wake up at 8:20 a.m. and make it to every 9:00 a.m. morning kickboxing class Monday through Friday then hit it hard on studying languages French and Japanese and make sure I get at least two recipes done this week for my blog! This past week didn’t go that way.

_DSC0488

I noticed myself falling. That deep, dark hole that I’m all to familiar with started to creep in the second I woke up on Monday morning. “Hello, my unwanted friend. Oh? What’s that you say? I’m not good enough? I will never accomplish anything or discover who I am as person?…Oh…that’s…great.” This conversation was never-ending till late this past Friday.

Ever since I realized that Musical Theatre was not the path for me, that it was more of a dream and desire of my adoptive parents, I realized that I was trying for years to please them and not myself. Going to theatre school, sitting out in the cold waiting for hours to MAYBE be seen for an audition, dealing with the numerous toxic people in the industry…it was exhausting and it definitely wasn’t what I wanted to do long-term. So, now that I’m off that path and separated from my adoptive family, I don’t know who I am. I have to start over completely.

Maybe I’m just complaining and maybe nothing is truly wrong with not knowing what you want to do with your life, but it honestly bothers me. I THINK I like cooking and I THINK I enjoy taking photos, but am I actually doing it for myself or for others again?

_DSC0544

Curry Chickpea Pita Sandwich

Serves 2-3

Ingredients 

1 can of drained chickpeas (or dried that have been cooked)

Half of a yellow onion finely diced

Sea Salt 

Black Pepper

1/2 tsp. of ground garlic

1/2 tsp. of smoked paprika 

1/2 tsp. of curry powder

1/4 tsp. of turmeric 

1 tsp. of Tahini 

Yogurt sauce:

1/4 cup of plain yogurt 

4 big garlic cloves minced

Half of a cucumber finely diced 

1 Squeeze of half of a lemon juice (about a 1 tsp)

Toppings and Extras:

2-3 Toasted pita pockets

1/8 cup of chopped cashews 

1 small handful of diced grape tomatoes 

1 small handful of arugula 

2 hard-boiled eggs (make the night before)

Directions:

  1. Preheat oven to 350 F.
  2. While the oven is preheating, make your yogurt sauce. Add the yogurt, minced garlic and cucumber and mix well together. Then add the squeeze of lemon juice. Be sure to only add a squeeze or two, about 1 tsp. (You don’t want the mixture to be too runny.) Then once the mixture is mixed well together set it in the fridge to rest.
  3. Then chop and prepare the toppings. Cashews, grape tomatoes, and washed arugula then set aside.
  4. By this time the oven should be done preheating and if not, continue to chop the half of the yellow onion for the chickpea mixture.
  5. Once the oven is heated add the pita pockets and toast them until warm.
  6. Then in a large pan on medium heat add 1 tsp. of olive oil. Once heated add the chickpeas, onions and spices and mix well together. Once the mixture is combined turn off the heat and then add 1 tsp. of tahini and mix again till combined. Move the pan off the heat and start serving.

I serve my pita pockets by cutting them with a scissors. I cut half of the top off the pita so it creates easy access to fill it in with the chickpeas and toppings. I did mine as followed, chickpeas, arugula, tomatoes, cashews, more chickpeas then yogurt sauce. Then I had the hard-boiled eggs on the side. Feel free to add the eggs into the pita pocket. Enjoy and happy eating!

_DSC0477

Photos by. Bernadette Mira

Bathroom Pizza…

pizzapizzachanel

Photography by. CHANEL(Left) and Bernadette Mira(Right)

Don’t be alarmed by the title, there is more to this story I promise…

My husband and I had a period of when we were away from each other. At the time we were boyfriend and girlfriend and during that period, I was unfortunately overwhelmed with a toxic family while living with them. My loving husband was up in Jersey City finding us a home. I was devastated that I couldn’t be with him and experience finding our first place together. Fortunately, his mother (my now mom) was able to help him.

We spent most of our days apart chatting on the phone and Skyping. Now skyping can be one of the most frustrating forms of communication. I was living literally in the middle of nowhere and the reception was at best okay during the early morning, not sure why that was. So, it was always in and out while we spoke with each other. Yet, I cherished those conversations.

One of the most memorable ones was when my husband found a place for us and it was his first night alone in the apartment. He described the place as being gross and dusty and needing a very good clean. He said that he was feeling lonely too and wish there was something to cheer him up. I can’t remember if it was his idea or mine or the both us, but he ended up spending his evening talking to me on Skype while bathing in a bathtub and eating a box of pizza. It was one of the most hilarious moments that I got to experience with him. He seemed content at that point even though we weren’t together and  knowing that made me happy.

A couple of years later, we decided to recreate that moment together. The idea of having pizza while eating in a tub and watching anime was extremely tempting. So, we spent the evening making a homemade pizza that was topped with delicious, oily, salty meat.(My husband’s favorite) After making the pizza we got the tub ready and the Ipad set up with one of our favorite anime shows. Unfortunately, after a while the temperature of the water and the heat from the pizza was too much for me to handle and the bathtub experience only lasted for maybe five minutes. We still laugh about it, because it really shows what type of relationship we have. That we’re able to be flexible even when things don’t work out exactly the way we want them to. So, if you ever get a chance, enjoy the silly moments of life and cherish them.

_DSC0588

Bathroom Pizza (Pesto and Spicy Tomato Sauce)

Ingredients 

Serves 6-8

Pesto sauce:

One can of pesto 3.5 oz or half of can

3 big garlic cloves 
 2 tbsp of crumbled goat cheese and mix

5-6 white mushrooms thinly sliced

Tomato sauce:

4 big garlic cloves minced
One 6 oz can of tomato paste
 1 tbsp of honey
Sprinkle of sea salt and black pepper
1 tsp of olive oil
2 tsp of red pepper flakes
Pinch of white pepper
2 tbsp of oregano
1 tsp of basil
8 to 10 tbsp of water
1 tbsp of minced fresh tarragon

Toppings:

 1 small purple onion diced in circles  

half of a small red pepper chopped in strips
2 andouille sausage chopped in circles
8 oz of grated mozzarella 

Extra:

Olive oil

Yeast

Sugar

Flour

Corn Flour

Pizza Stone

Medium size bowl 

Damp dish towel

_DSC0573

Directions:

  1. Firstly make the pizza dough. I used this wonderful  pizza dough recipe from Sarah’s Cucina Bella website. Follow as instructed. While the dough is rising, continue to the following steps bellow for the sauces.
  2. In a small to medium size bowl, add the can of pesto, two big minced garlic cloves and goat cheese. Combine together. Then set aside.
  3. Then slice the other big garlic clove (3rd one) in long slices. Once finished wrap in plastic wrap and set in fridge.
  4. Then thinly slice the white mushrooms and set aside in fridge also. Preheat the oven at this point to 450 F.
  5. For the Tomato sauce, add all ingredients to a medium size bowl and combine. Set aside in the fridge with plastic wrap on top till ready to use.
  6. Prepare the toppings for the pizza. Grate the mozzarella and set aside till use. In a medium sauce pan sautee half of the purple onion and some of the red pepper with 2 tbsp of olive oil. Sautee on low to medium heat until slightly brown. Set aside when finished.
  7. In the same pan or cast iron skillet, add the sliced sausage with 2 tbsp of olive oil. Sautee until slightly brown or slightly crispy. Then set aside until ready to use.
  8. Once the pizza dough is done, lightly flour the work surface and roll out the dough into a circle. (It doesn’t have to be perfect.)
  9. Then, create a uniform layer of corn flour onto the pizza stone so the dough doesn’t stick. Then carefully transfer the pizza dough to the pizza stone.
  10. Then its time to add the sauces, cheese and toppings. Start with adding the pesto sauce to half of the dough. Then add the tomato sauce to the other half. Once the sauces are on the pizza add the toppings accordingly.
  11. Pesto side- sauce, mozzarella cheese, mushrooms, garlic
  12. Tomato side- sauce, mozzarella cheese, sautéed onions and pepper.
  13. Once finished add the pizza to the oven. Bake for 6 minutes. Once the 6 minutes are up add the sausage and the remaining onions and peppers to the tomato sauce side. Then bake again for 15-20 minutes or until the sides are crispy brown.
  14. Enjoy!!!

bathpizza

chanel-lips

Photos by. Bernadette Mira

Blasting Pink Pickled Onions

pinkpink

Photography by. Daniel Riera(Left) and Bernadette Mira(Right)

Model: Aamito Lagum

I am currently curled up in bed watching Anime while writing this with a big tissue box right beside me. Yup, that’s right, I have a freaking cold!

I can’t even remember the last time I had a cold but this one is a killer. I think I took at least four showers today to try to get out the gunk that is lodge in my chest and nose, TMI?

I’m gonna make this post short and sweet and hope you guys are having a better time than I am. Not that I don’t enjoy endless Anime, I just wish I didn’t have this cold to pair along with it.

Without further talk, since I literally can’t talk, I’ll leave you with today’s recipe, it’s a yummy one! Enjoy and have a healthy week!

_DSC0154

Blasting Pink Pickled Onions

Makes One mason jar full

Ingredients

2 small purple onions

1/2 cup of apple cider vinegar

sprinkle of sea salt

sprinkle of mustard seeds

1/2 tsp. of cracked black pepper

1/2 tsp. of granulated sugar

Directions:

  1. Chop up two small purple onions into thin rounds.
  2. In a mason jar add the onions and the rest of the ingredients. Tightly fasten the mason jar lid and shake the ingredients like crazy till mixed well.
  3. Leave out for an hour or immediately refrigerate. The pickled onions will keep for a month in the fridge.

Enjoy on top of toasted rye bread with a little spread of goat cheese!

Photos by. Bernadette Mira

Toasted Yellow Tomato Bruschetta

GOLDGOLD

Photography by. Cuneyt Akeroglu and Bernadette Mira(Right)

Model. Natalia Vodianova

The other day, I passed by my local market. I was planning to get the usual groceries. Bread, peanut butter…I think you know where I’m going with this. Then out of nowhere I noticed the most vibrant, luscious yellow tomatoes. Sometimes, I buy food off the whim, which isn’t necessarily the best option but I told myself, “I have to do something special with these.”

Now, I want you to set your mind off to a far away place. This place is Turkey. See yourself in crowd of people. You happen to find yourself in an alleyway market place that is filled to the brim with beautiful, majestic colors and spices. You set yourself down at a nearby table and are served something delicious…

Toasted Yellow Tomato Bruschetta

Inspired by Turkey

Serves 2

Ingredients 

2 pieces of crusty bread 

1 yellow tomato

2 tsp. of oregano

1/2 tsp. of thyme

spreadable goat cheese

 a small fist full of crushed spinach 

olive oil to drizzle 

spritz of lemon juice and zest

sea salt and pepper to taste

Extra

aluminum foil

mortar and pestle 

Directions:

  1. Preheat oven to 420 F.
  2. While the oven is preheating prepare the crushed spinach.
  3. In a mortar and pestle crush the spinach with a spritz of lemon juice. Crush the spinach until it resembles a type of vibrant green paste. Set the paste aside.
  4. Make a small bowl or simply fold the aluminum foil over on the sides, creating a small square shape, enough to fit the bread and yellow tomato. Drizzle some oil over both the bread and tomato. Sprinkle the tomato with pepper and sea salt. Then sprinkle some oregano and thyme over the bread.
  5. Carefully place the aluminum bowl that you created into the oven and let it bake for 15-20 minutes.
  6. Once the bread and tomato are done baking, carefully chop the tomato(It will most likely be hot and messy.)
  7. Spread the spinach paste on the bread along with some spreadable goat cheese. Top it off with the toasted tomato, lemon zest, oregano and a drizzle of olive oil.

Enjoy and happy eating!

Gold10

Photo by. Bernadette Mira